How to Optimize Your Website Images

Images are key components of websites. They help tell a brand’s story and assist in the overall look and feel of the website overall. Since they are such an important part of a website, it is key to ensure that they do not negatively affect it. Images are the main culprit in slowing down your website. That’s why it’s important that you optimize them so that your site speed is minimally affected by them.
What is Image Optimization and Why Does it Matter
Image optimization is a fancy term for compressing website images. It involves reducing the image file size so that they remain small. Images are the largest contributor to page size, which ultimately affects our page load times. This is imperative because page load times have a direct effect on your SEO. Google actually uses page load time as a factor in determining your search engine ranking. We all want to rank high on search results, so optimizing our images can help us toward that goal.
It also has a direct effect on how people interact with your website. Think about it, we’ve all been there. Ever get frustrated waiting for a website to load? I know I have. When that happens, I usually end up on another site looking for the same information I was searching on the site that wouldn’t load. That behavior is common among website visitors, with nearly 50% of consumers not even waiting 3 seconds for an e-commerce site to load. This means that if you do not have a website that loads fast, you will be missing out on tons of potential clients or customers from engaging with your website.
How to Optimize Website Images
Now that we know we need to optimize our images, how exactly do we do that? I will walk you through my step-by-step process in the following section.
1. Reduce Image Size
The first step in my image optimization process is to reduce the overall size of the image I’m working with. I generally reduce images to about 1500px wide, as recommended by Rache via the Standout Squarespace program. You can use any photo editing program to do this. I generally use Preview or Photoshop, depending on which is most convenient for me at the time.
2. Check Your File Type
Images come in a variety of file types including JPEG, PNG, SVG and GIF. Which type is best for your website though? Let’s discuss some of the most common file types below:
JPEG
JPEG files are the standard image type for the web. JPEG images are great for keeping file sizes low even though there may be a lot of colors used within a photo. In most instances, JPEG images will provide the best image quality at the smallest file size.
PNG
If you need an image with a transparent background, then PNG is your best bet. It’s an image type that uses a more limited range of colors than JPEG. A logo file is a good candidate for the PNG format.
GIF
GIFs are an outdated file type that can drastically increase loading times on a site. It is not recommended you use GIFs on your website, if possible.
3. Compress the Image
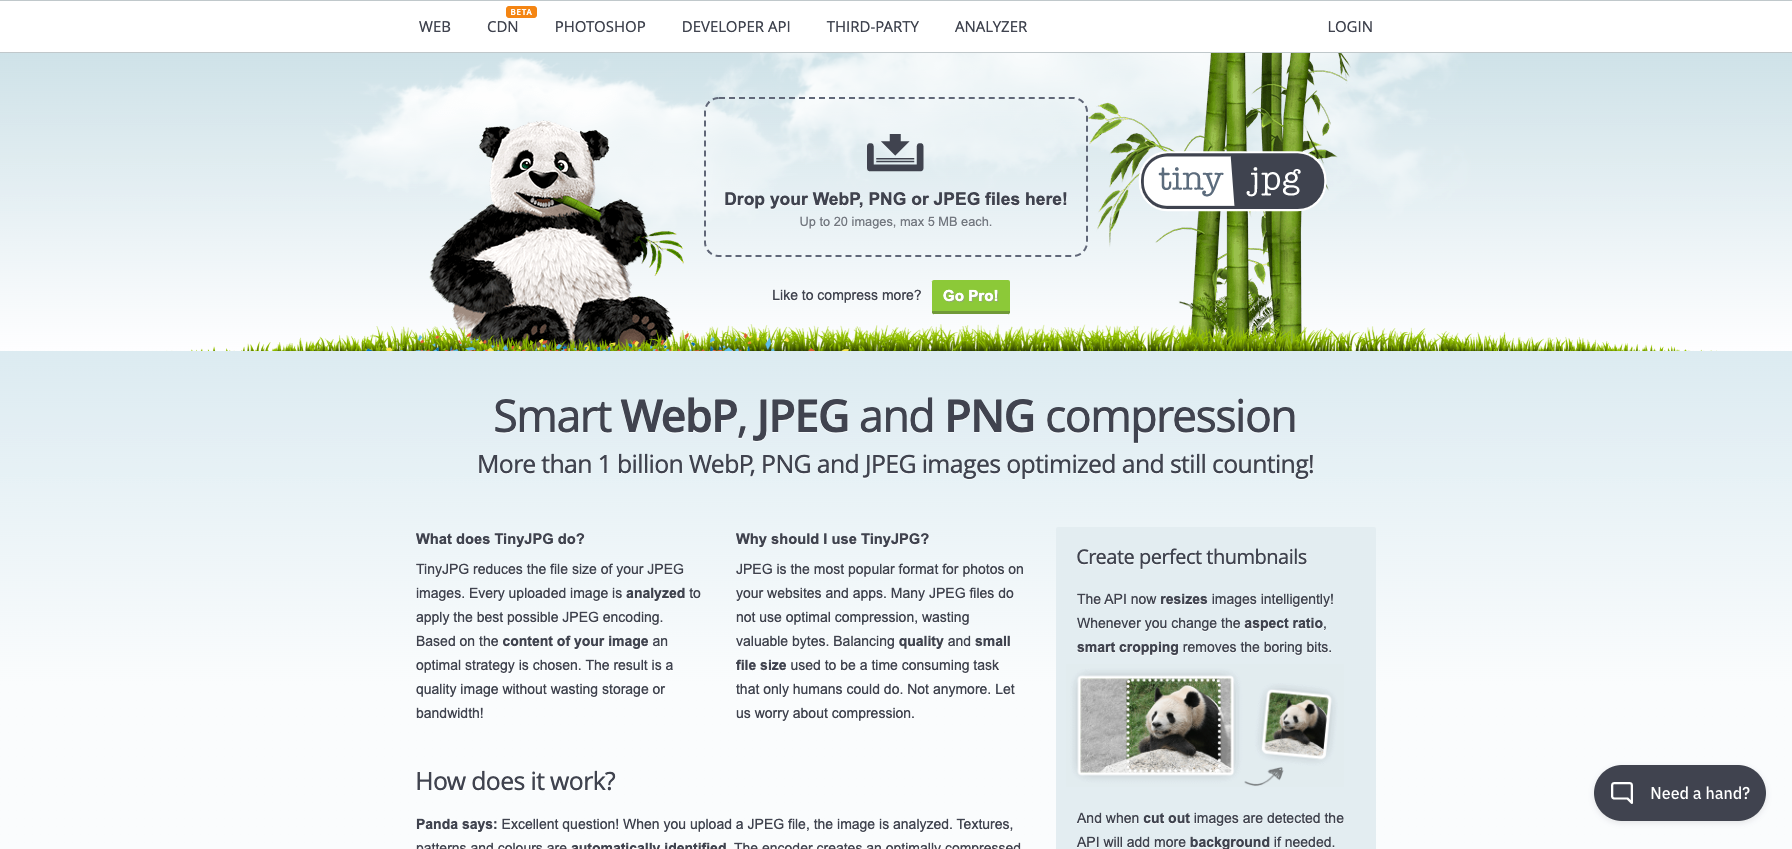
Next, I compress the images further using tinyjpg.com This is a free website that does all the image compressing for you, without you having to do anything.
Note: If the image you’re trying to compress is larger than 5MB, reduce the file size again to ensure it’s under the 5MB mark.
4. Upload
Finally, you’re ready to upload your image to your website. If you’re using Squarespace, here’s a helpful guide on how to work with Image Blocks.
Conclusion
This might seem like a lot of steps to simply update a photo on your website, but I promise, it’s worth it. Making sure your website remains fast will drastically improve your SEO and your client conversion. Luckily the steps to compress your images are straightforward, so you shouldn’t have a difficult time doing this on your own. If you need additional support though, feel free to reach out and I’ll be happy to assist with your website needs.
Take care and talk soon,
Alex